Blazor .NET Template






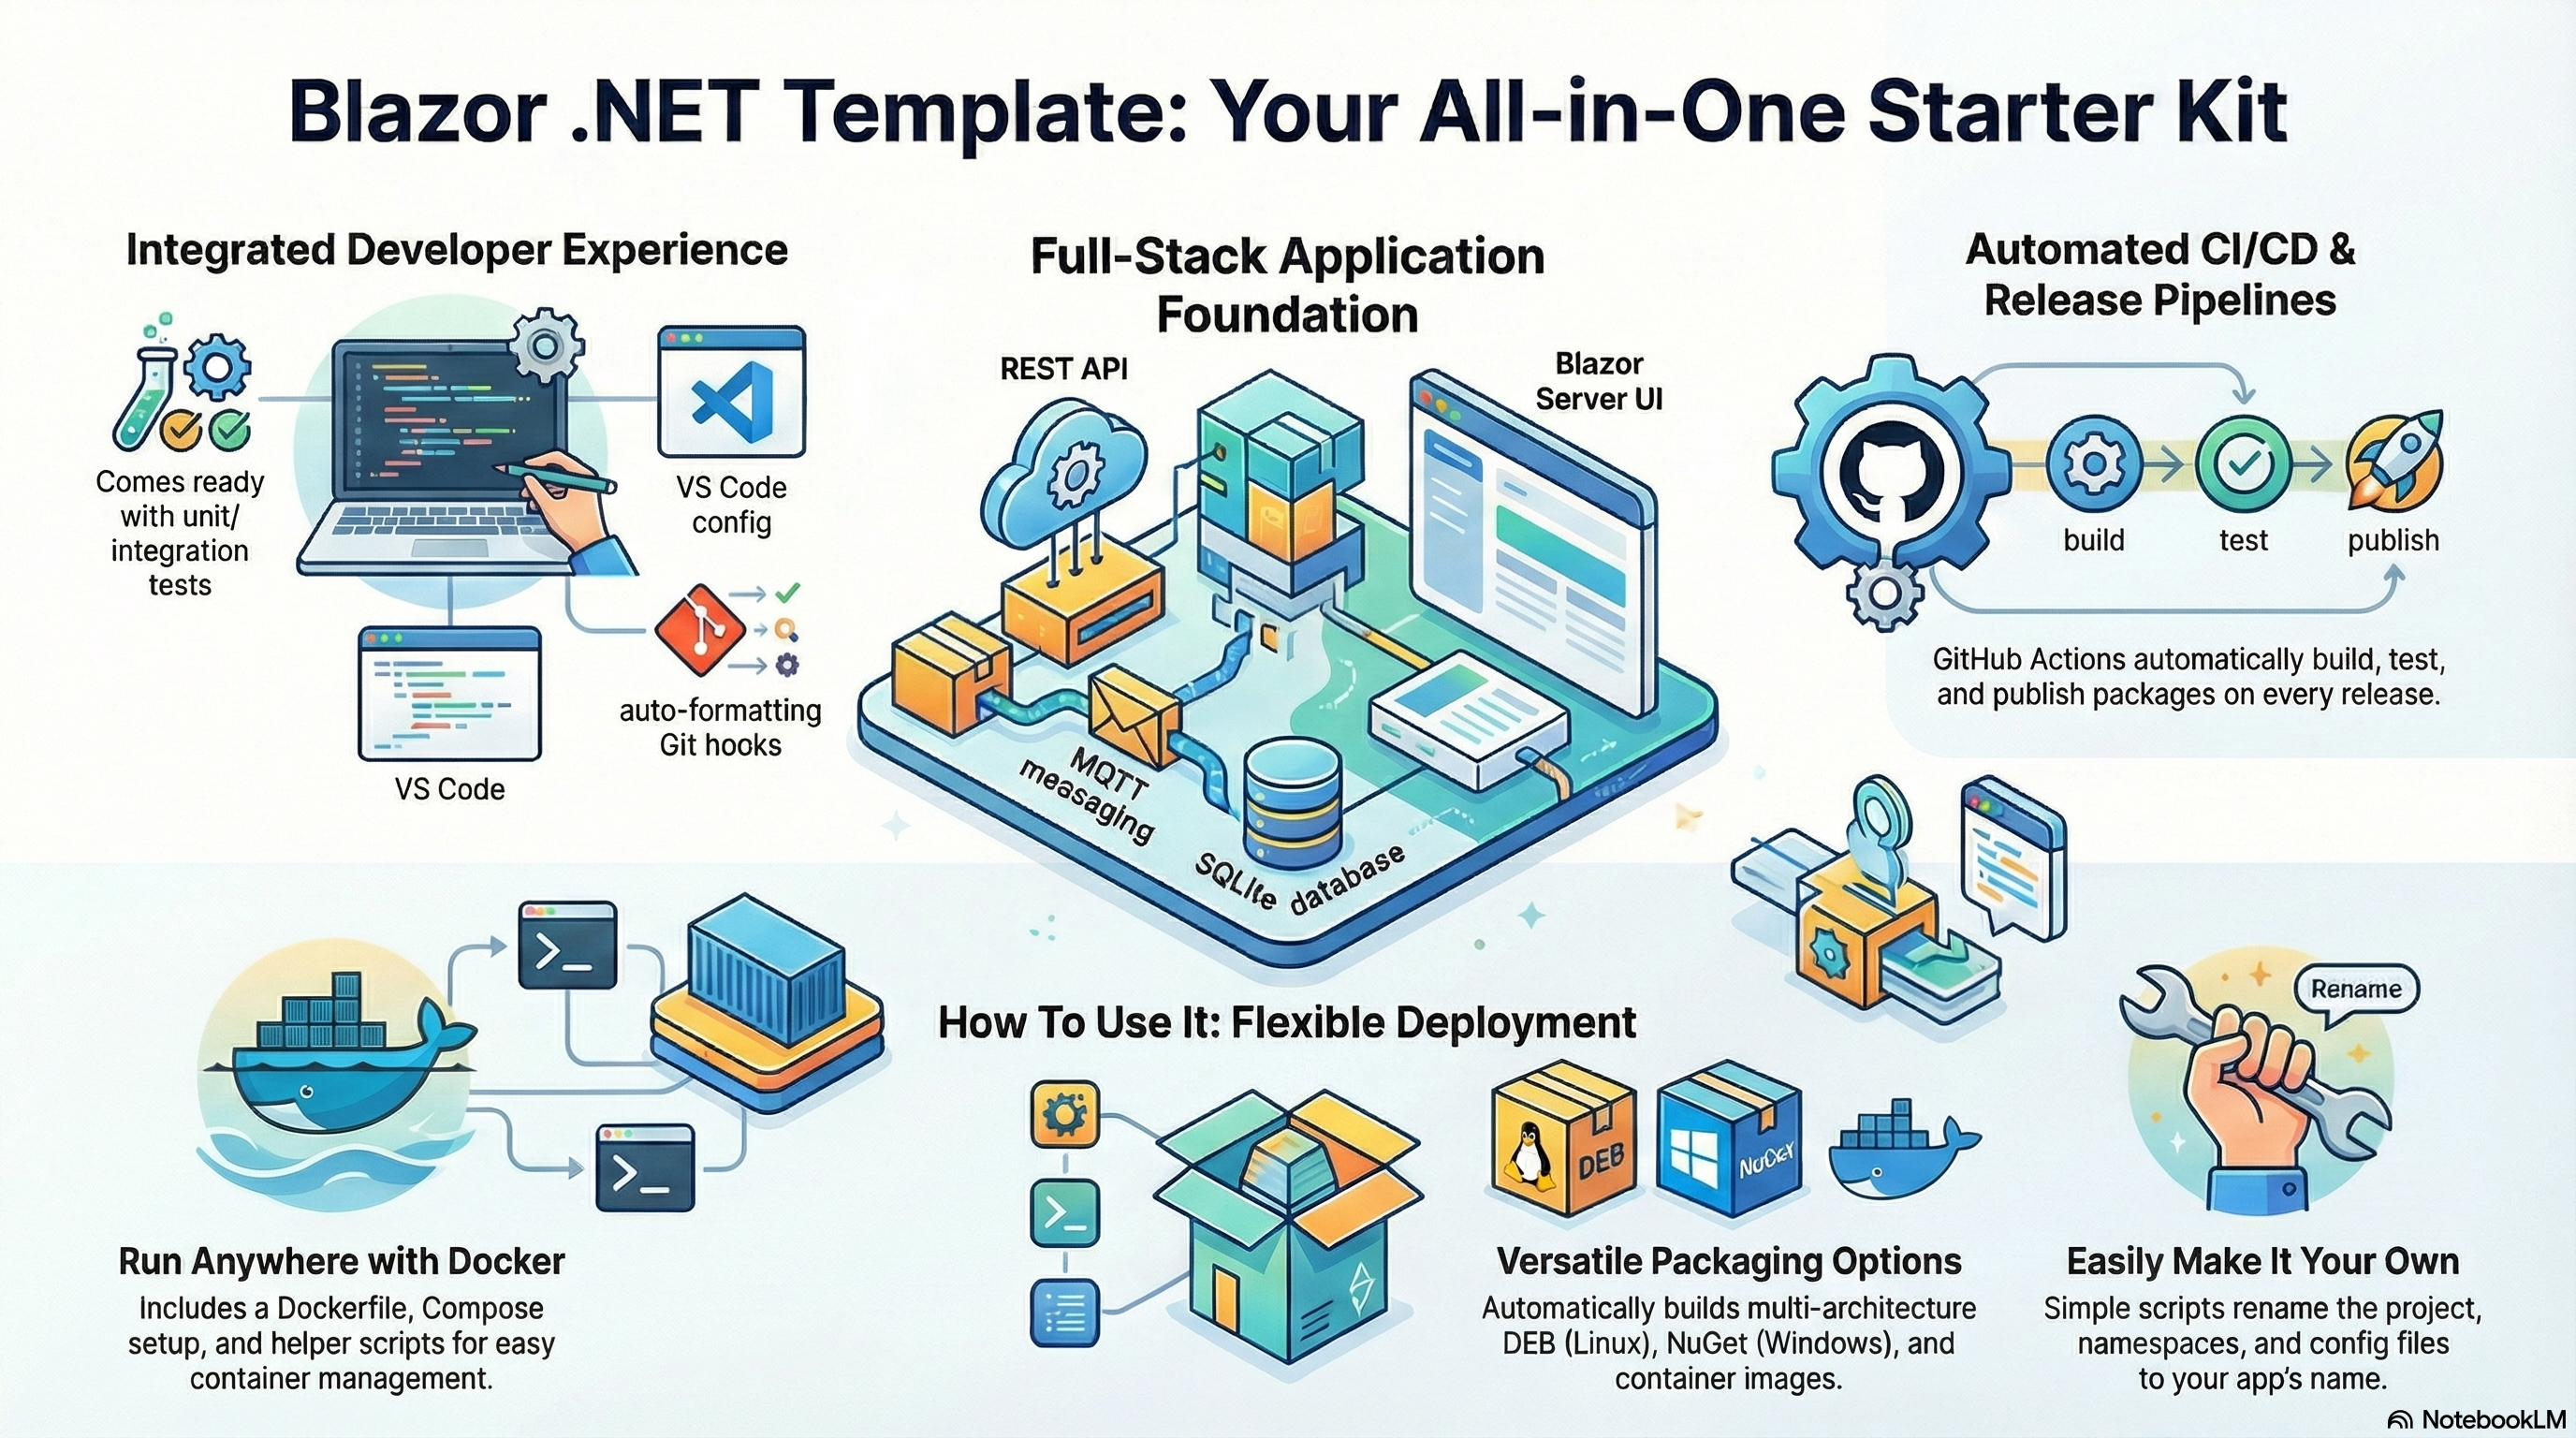
A comprehensive .NET template featuring REST API, MQTT support, SQLite database, OpenAPI/Swagger documentation, Blazor Server UI built with ASP.NET Core, and Template scrips.
📖 Table of Contents
- 📚 Documentation
- Features
- Customizing the Application Name
- Quick Start
- Project Structure
- API Endpoints
- Configuration
- Docker Development
- MQTT Integration
- Production Deployment
- Development
- GitHub Actions
- Contributing
- License
- Acknowledgments
- Support
📚 Documentation
Full documentation is available on GitHub Pages:
- README - Getting started and features
- Contributing Guide - How to contribute
- Implementation Summary - Technical details
Features
🚀 Core Features
- REST API - Full CRUD operations with ASP.NET Core Web API
- MQTT Support - Pub/sub messaging with MQTTnet
- SQLite Database - Entity Framework Core with migrations
- OpenAPI/Swagger - Interactive API documentation
- Web Interface - Blazor Server UI
- Unit Tests - xUnit with FluentAssertions and Moq
- Integration Tests - WebApplicationFactory for API testing
🛠️ Development
- Code Formatting - EditorConfig for consistent code style
- VS Code Ready - Launch and task configurations included
- JetBrains Rider Ready - Run configurations for debugging, testing, and building
- GitHub Actions - CI/CD with automated testing and builds
- Hot Reload - dotnet watch for rapid development
- Setup Scripts - Automated dependency installation scripts
- Git Hooks - Pre-commit formatting for consistent code quality
📦 Deployment
- Docker Images - Multi-architecture images published to GitHub Packages (Container Registry)
- Docker Compose - Local development with MQTT broker included
- DEB Packages - Automated builds for amd64 and arm64, pushed to APT repository
- NuGet Packages - .NET Global Tool for Windows installation
- Systemd Service - Production deployment on Ubuntu/Debian
🔧 Customization
- Rename Script - Easy app renaming with bash or PowerShell scripts
- Configurable - Customize all aspects of the template
Customizing the Application Name
The template comes with scripts to easily rename the application from “blazor-net-app” to your own application name.
Using Bash (Linux/macOS)
./rename-app.sh my-cool-app
Using PowerShell (Windows)
.\Rename-App.ps1 -NewAppName my-cool-app
The scripts will:
- Rename all directories and files
- Update namespaces in C# files
- Update configuration files (including MQTT topic prefixes)
- Update deployment scripts
- Update documentation
- Update UI display names and titles
- Update Blazor component files
Note: The app name should be in kebab-case (lowercase with hyphens, e.g., my-cool-app).
Quick Start
Prerequisites
- .NET 10 SDK
- SQLite (included)
- Optional: MQTT broker (e.g., Mosquitto) for MQTT features
- Optional: Docker and Docker Compose for containerized development
Quick Setup: Use the provided setup script to install all dependencies automatically:
# Install all dependencies at once (Linux/macOS)
./scripts/setup.sh
Or install dependencies individually:
./scripts/install-dotnet10.sh    # .NET 10 SDK
./scripts/install-sqlite3.sh     # SQLite3
./scripts/install-mosquitto.sh   # MQTT broker
./scripts/install-docker.sh      # Docker and Docker Compose
Running Locally
Option 1: Using Docker (Recommended for Development)
-
Clone the repository
git clone https://github.com/mlmdevs/blazor-net-template.git cd blazor-net-template -
Start with Docker Compose
Linux/macOS:
./docker-dev.sh startWindows (PowerShell):
.\docker-dev.ps1 -Command startThis will:
- Build the Docker image
- Start the application container
- Start a Mosquitto MQTT broker
- Create persistent volumes for data
-
Access the application
- Web UI: http://localhost:5000
- Swagger API: http://localhost:5000/swagger
- MQTT Broker: localhost:1883
-
View logs
./docker-dev.sh logs # Linux/macOS .\docker-dev.ps1 logs # Windows -
Stop containers
./docker-dev.sh stop        # Linux/macOS
.\docker-dev.ps1 stop       # Windows
See the Docker Development section for more commands.
Option 2: Using .NET CLI
-
Clone the repository
git clone https://github.com/mlmdevs/blazor-net-template.git cd blazor-net-template -
Set up git hooks (optional but recommended)
./.githooks/install.shThis installs a pre-commit hook that automatically formats code before commits.
-
Restore dependencies
dotnet restore -
Run the application
dotnet run --project src/BlazorNetApp.Api -
Access the application
- Web UI: https://localhost:5001 or http://localhost:5000
- Swagger API: https://localhost:5001/swagger
Running Tests
# Run all tests
dotnet test

# Run with coverage
dotnet test --collect:"XPlat Code Coverage"

# Run specific test project
dotnet test tests/BlazorNetApp.Tests
dotnet test tests/BlazorNetApp.IntegrationTests
VS Code
- Open the project in VS Code
- Install recommended extensions when prompted
- Press
F5to start debugging - The application will open automatically in your browser
JetBrains Rider
- Open the project in JetBrains Rider (open the
BlazorNetApp.slnfile) - The project includes pre-configured run configurations for:
- BlazorNetApp.Api (Debug) - Run/debug the main API project
- All Unit Tests - Run unit tests
- All Integration Tests - Run integration tests
- All Tests (Unit + Integration) - Run all tests
- Build Solution - Build the entire solution
- Build NuGet Package - Create a NuGet package
- Build Docker Image - Build a Docker image
- Build Debian Package (amd64) - Create a Debian package
- Select a configuration from the dropdown in the toolbar and press
F5to run/debug - Use
Ctrl+Shift+F10(Windows/Linux) orCmd+Shift+F10(macOS) to run the current test
Project Structure
blazor-net-template/
├── src/
│   └── BlazorNetApp.Api/                    # Main API project
│       ├── Controllers/               # API controllers
│       ├── Data/                      # Database context
│       ├── Models/                    # Data models
│       ├── Pages/                     # Razor Pages for UI
│       ├── Services/                  # Background services (MQTT)
│       └── wwwroot/                   # Static files (CSS, JS)
├── tests/
│   ├── BlazorNetApp.Tests/                 # Unit tests
│   └── BlazorNetApp.IntegrationTests/      # Integration tests
├── scripts/                           # Setup and install scripts
│   ├── setup.sh                       # Master setup script
│   ├── install-dotnet10.sh            # .NET 10 installation
│   ├── install-sqlite3.sh             # SQLite3 installation
│   ├── install-mosquitto.sh           # MQTT broker installation
│   └── install-docker.sh              # Docker installation
├── deployment/
│   ├── systemd/                       # Systemd service files
│   └── install.sh                     # Installation script
├── .githooks/                         # Git hooks for code formatting
│   ├── pre-commit                     # Pre-commit formatting hook
│   └── install.sh                     # Hook installation script
├── .github/workflows/                 # GitHub Actions workflows
│   ├── ci-cd.yml                      # Build and test workflow
│   └── release.yml                    # Release and publish workflow
├── .vscode/                           # VS Code configuration
├── Dockerfile                         # Docker image build
├── docker-compose.yml                 # Docker Compose setup
├── mosquitto.conf                     # MQTT broker config
├── docker-dev.sh                      # Docker dev script (Linux/macOS)
├── docker-dev.ps1                     # Docker dev script (Windows)
├── rename-app.sh                      # Rename script (Bash)
├── Rename-App.ps1                     # Rename script (PowerShell)
├── build-deb.sh                       # DEB package build script
├── build-nuget.ps1                    # NuGet package build script
└── .editorconfig                      # Code style settings
API Endpoints
TodoItems
GET /api/todoitems- Get all TODO itemsGET /api/todoitems/{id}- Get a specific TODO itemPOST /api/todoitems- Create a new TODO itemPUT /api/todoitems/{id}- Update a TODO itemDELETE /api/todoitems/{id}- Delete a TODO item
Swagger Documentation
GET /swagger- Interactive API documentation
Configuration
appsettings.json
{
  "ConnectionStrings": {
    "DefaultConnection": "Data Source=blazor-net-app.db"
  },
  "Mqtt": {
    "Enabled": false,
    "Broker": "localhost",
    "Port": 1883,
    "ClientId": "blazor-net-app",
    "Topic": "blazor-net-app/#"
  }
}
Environment Variables
ASPNETCORE_ENVIRONMENT- Set toDevelopmentorProductionASPNETCORE_URLS- Override default URLs (e.g.,http://0.0.0.0:5000)
Docker Development
The project includes convenient scripts for Docker-based development with an integrated MQTT broker.
Available Commands
Linux/macOS:
./docker-dev.sh [command]
Windows (PowerShell):
.\docker-dev.ps1 -Command [command]
Commands
start- Build and start containers (default)stop- Stop all containersrestart- Restart containerslogs- View container logs (Ctrl+C to exit)clean- Stop containers and remove volumesbuild- Rebuild Docker image from scratch
What’s Included
When you run docker-dev.sh start or docker-dev.ps1 start, it will:
- Build the .NET application Docker image
- Start the blazor-net-app container on port 5000
- Start a Mosquitto MQTT broker on port 1883
- Create persistent Docker volumes for:
- Application database (
blazor-net-app-data) - MQTT broker data (
mosquitto-data) - MQTT broker logs (
mosquitto-logs)
- Application database (
Accessing Services
- Web UI: http://localhost:5000
- Swagger API: http://localhost:5000/swagger
- MQTT Broker: localhost:1883
- MQTT WebSockets: ws://localhost:9001
Development Workflow
# Start development environment
./docker-dev.sh start

# Make code changes in your editor

# Rebuild and restart to test changes
./docker-dev.sh build
./docker-dev.sh restart

# View logs to debug
./docker-dev.sh logs

# Clean up when done
./docker-dev.sh clean
Testing MQTT with Docker
When using Docker, the MQTT broker is automatically configured and accessible. Test it using mosquitto clients:
# Subscribe to responses
mosquitto_sub -h localhost -t "blazor-net-app/response/#" -v

# Send a command (in another terminal)
mosquitto_pub -h localhost -t "blazor-net-app/command/getall" \
  -m '{"correlationId":"test-123"}'
MQTT Integration
The template includes comprehensive MQTT support for pub/sub messaging. When enabled, the application:
- Publishes events when TODO items are created, updated, or deleted
- Receives and processes commands via MQTT topics
- Supports all CRUD operations through MQTT (same as REST API)
Enabling MQTT
- Install and run an MQTT broker (e.g., Mosquitto)
- Update
appsettings.jsonto setMqtt:Enabledtotrue - Configure broker address and port as needed
MQTT Command Topics
The application subscribes to blazor-net-app/command/# and supports the following commands:
Get All TODO Items
Topic: blazor-net-app/command/getall
Payload:
{
  "correlationId": "optional-request-id"
}
Get TODO Item by ID
Topic: blazor-net-app/command/get
Payload:
{
  "id": 1,
  "correlationId": "optional-request-id"
}
Create TODO Item
Topic: blazor-net-app/command/create
Payload:
{
  "title": "New TODO Item",
  "description": "Optional description",
  "isCompleted": false,
  "correlationId": "optional-request-id"
}
Update TODO Item
Topic: blazor-net-app/command/update
Payload:
{
  "id": 1,
  "title": "Updated Title",
  "description": "Updated description",
  "isCompleted": true,
  "correlationId": "optional-request-id"
}
Delete TODO Item
Topic: blazor-net-app/command/delete
Payload:
{
  "id": 1,
  "correlationId": "optional-request-id"
}
MQTT Responses
Responses are published to:
blazor-net-app/response/{correlationId}if a correlationId was providedblazor-net-app/responseotherwise
Success Response:
{
  "success": true,
  "data": {
    /* returned object */
  }
}
Error Response:
{
  "success": false,
  "error": "Error message"
}
Testing with Mosquitto
Install mosquitto clients:
# Ubuntu/Debian
sudo apt-get install mosquitto-clients

# macOS
brew install mosquitto
Subscribe to responses:
mosquitto_sub -h localhost -t "blazor-net-app/response/#" -v
Send a command (in another terminal):
# Create a TODO item
mosquitto_pub -h localhost -t "blazor-net-app/command/create" \
  -m '{"title":"Test via MQTT","description":"Testing","correlationId":"test-123"}'

# Get all TODO items
mosquitto_pub -h localhost -t "blazor-net-app/command/getall" \
  -m '{"correlationId":"test-456"}'

# Update a TODO item
mosquitto_pub -h localhost -t "blazor-net-app/command/update" \
  -m '{"id":1,"title":"Updated","isCompleted":true,"correlationId":"test-789"}'

# Delete a TODO item
mosquitto_pub -h localhost -t "blazor-net-app/command/delete" \
  -m '{"id":1,"correlationId":"test-999"}'
Production Deployment
Using Docker (Recommended for Production)
Docker images are automatically built and published to GitHub Container Registry on each release, supporting both amd64 and arm64 architectures.
Pull and Run from GitHub Packages
-
Log in to GitHub Container Registry
echo $GITHUB_PAT | docker login ghcr.io -u USERNAME --password-stdinReplace
GITHUB_PATwith a GitHub Personal Access Token withread:packagespermission, andUSERNAMEwith your GitHub username. -
Pull the image
docker pull ghcr.io/mlmdevs/blazor-net-template:latest -
Run the container
docker run -d \ --name blazor-net-app \ -p 8080:8080 \ -v blazor-net-app-data:/app/data \ -e ASPNETCORE_ENVIRONMENT=Production \ -e Mqtt__Enabled=false \ ghcr.io/mlmdevs/blazor-net-template:latest -
Access the application
- Web UI: http://localhost:8080
- Swagger API: http://localhost:8080/swagger
Docker Compose for Production
Create a docker-compose.prod.yml:
version: "3.8"

services:
  blazor-net-app:
    image: ghcr.io/mlmdevs/blazor-net-template:latest
    container_name: blazor-net-app
    ports:
      - "8080:8080"
    environment:
      - ASPNETCORE_ENVIRONMENT=Production
      - Mqtt__Enabled=true
      - Mqtt__Broker=mosquitto
    volumes:
      - blazor-net-app-data:/app/data
    restart: unless-stopped

  mosquitto:
    image: eclipse-mosquitto:2
    container_name: blazor-net-app-mosquitto
    ports:
      - "1883:1883"
    volumes:
      - mosquitto-data:/mosquitto/data
      - ./mosquitto.conf:/mosquitto/config/mosquitto.conf:ro
    restart: unless-stopped

volumes:
  blazor-net-app-data:
  mosquitto-data:
Then run:
docker-compose -f docker-compose.prod.yml up -d
Environment Variables
Configure the application using environment variables:
ASPNETCORE_ENVIRONMENT- Set toProductionASPNETCORE_URLS- Override URLs (default:http://+:8080)ConnectionStrings__DefaultConnection- SQLite database pathMqtt__Enabled- Enable/disable MQTT (true/false)Mqtt__Broker- MQTT broker hostnameMqtt__Port- MQTT broker port (default:1883)Mqtt__ClientId- MQTT client IDMqtt__Topic- MQTT topic pattern
Using NuGet Package (Windows)
Install as .NET Global Tool
-
Configure GitHub Packages as a NuGet source (one-time setup)
dotnet nuget add source "https://nuget.pkg.github.com/mlmdevs/index.json" `
  --name "GitHub-mlmdevs" `
  --username YOUR_GITHUB_USERNAME `
  --password YOUR_GITHUB_PAT `
  --store-password-in-clear-text
Replace
YOUR_GITHUB_USERNAMEwith your GitHub username andYOUR_GITHUB_PATwith a GitHub Personal Access Token withread:packagespermission. -
Install the tool
dotnet tool install --global BlazorNetApp --version <version> -
Run the application
blazor-net-appThe application will start and be accessible at:
- Web UI: https://localhost:5001 or http://localhost:5000
- Swagger API: https://localhost:5001/swagger
Note: The database file (
blazor-net-app.db) will be created in your current working directory. -
Update to a newer version
dotnet tool update --global BlazorNetApp -
Uninstall
dotnet tool uninstall --global BlazorNetApp
Install from Release Assets
Alternatively, you can download the .nupkg file from the releases page and install it locally:
dotnet tool install --global --add-source ./path/to/folder BlazorNetApp
Replace ./path/to/folder with the directory containing the downloaded .nupkg file.
Using DEB Package (Ubuntu/Debian)
-
Download the latest release from the releases page
-
Install the package
sudo dpkg -i blazor-net-app_<version>_<arch>.debNote: The DEB package is self-contained and includes .NET 10 runtime. No additional dependencies are required.
The service runs in Production mode and stores the database at
/var/lib/blazor-net-app/blazor-net-app.db. -
Manage the service
sudo systemctl status blazor-net-app sudo systemctl restart blazor-net-app sudo systemctl stop blazor-net-app sudo systemctl start blazor-net-app -
View logs
sudo journalctl -u blazor-net-app -f
Manual Installation
-
Publish the application
dotnet publish src/BlazorNetApp.Api/BlazorNetApp.Api.csproj \ --configuration Release \ --output publish \ --runtime linux-x64 \ --self-contained true -
Run the installation script
sudo ./deployment/install.sh
Development
Adding New Features
- Create a new model in
src/BlazorNetApp.Api/Models/ - Add DbSet to
ApplicationDbContext - Create a controller in
src/BlazorNetApp.Api/Controllers/ - Update UI in
src/BlazorNetApp.Api/Pages/andwwwroot/ - Write tests in
tests/
Code Style
The project uses EditorConfig for consistent code formatting.
Format check:
dotnet format --verify-no-changes
Auto-format code:
dotnet format
Pre-commit hook (automatic formatting):
Set up the pre-commit hook to automatically format code before each commit:
./.githooks/install.sh
After installation, any commit will trigger automatic code formatting. If issues are found, they will be fixed automatically, and you’ll need to review and stage the changes before committing again.
Database Migrations
# Create a migration
cd src/BlazorNetApp.Api
dotnet ef migrations add MigrationName

# Apply migrations
dotnet ef database update
GitHub Actions
The project includes two workflows:
-
CI/CD (
ci-cd.yml) - Runs on push/PR- Builds the solution
- Runs all tests
- Checks code formatting
- Publishes artifacts
-
Release (
release.yml) - Runs on version tags- Builds and pushes Docker images (amd64 & arm64) to GitHub Container Registry
- Builds DEB packages for amd64 and arm64
- Pushes DEB packages to APT repository
- Builds and pushes NuGet package to GitHub Packages
- Creates GitHub release with all packages
To create a release:
git tag -a v1.0.0 -m "Release version 1.0.0"
git push origin v1.0.0
Contributing
Contributions are welcome! Please:
- Fork the repository
- Create a feature branch (
git checkout -b feature/amazing-feature) - Commit your changes (
git commit -m 'Add amazing feature') - Push to the branch (
git push origin feature/amazing-feature) - Open a Pull Request
License
This project is licensed under the MIT License - see the LICENSE file for details.
Acknowledgments
- Built with ASP.NET Core
- MQTT support via MQTTnet
- UI powered by Bootstrap 5
- Testing with xUnit and FluentAssertions
Support
For issues and questions: